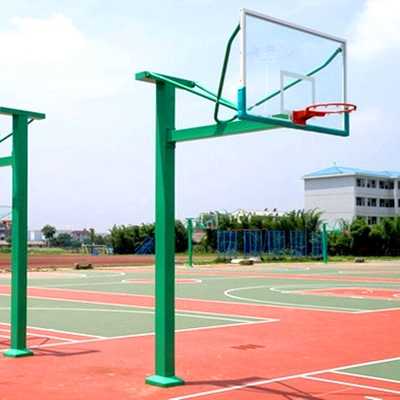
What tools are needed for installing a fixed basketball hoop in a stadium?
The installation of fixed basketball hoops in a stadium requires a series of specialized tools and auxiliary equipment to ensure a precise, safe, and compliant installation process. The following are the main tools required for installation and their specific uses:

I. Foundation Construction Tools
* Measuring and Positioning Tools
* Laser Level: Used to calibrate the verticality of the basketball hoop uprights, ensuring no tilting after installation (verticality deviation ≤ H/1000, where H is the upright height).
Measuring Tape/Steel Ruler: Measure the foundation dimensions, spacing of embedded parts, and installation positions to ensure compliance with design drawings (e.g., foundation side length error ≤ 5mm).
Ink Line Box: Used to mark the foundation center line and embedded part position lines on the ground for precise positioning.
Cement Nails/Wedges: Used to fix the ink lines and prevent displacement during construction.
Excavation and Pouring Tools
* Electric Pickaxe/Pneumatic Pickaxe: Used to break up old foundations or hard surfaces, improving excavation efficiency.
Shovel/Hand Pick: Used for manually clearing excavated soil and trimming the edges of the foundation pit.
Vibrator: Used to compact concrete during pouring, eliminating air bubbles and improving foundation strength (vibration time ≥ 30 seconds/point). **Groove/Scraper:** Surface finishing, ensuring the flatness error of the base surface is ≤2mm.
II. Structural Assembly Tools
**Handling Tools:** Forklift/Manual Hydraulic Truck: For short-distance transport of basketball hoop components, reducing the risk of manual lifting.
**Tightening and Connection Tools:** Torque Wrench: Tighten bolts according to design requirements (e.g., M16 bolt torque value 120-150 N·m) to ensure a secure connection.
Electric Wrench: Quickly remove or install bolts, improving efficiency (must match bolt specifications).
Socket/Open-end Wrench: Assist in tightening bolts in confined spaces.
Welding Machine: For repairing or reinforcing welds (e.g., at the connection between the column and base), requires J422 welding rods and a protective mask.
**Adjustment and Calibration Tools:** Angle Gauge: Measure the angle between the extension arm and the ground (usually 45°-50°) to ensure the shooting area meets standards.
Level Tube/Level Ruler: Calibrate the levelness of the backboard (error ≤2mm/m) to prevent abnormal basketball bounce.
Feeler gauge: Check the gap between the backboard and the extension arm (should be ≤1mm) to prevent loosening.
III. Safety Protective Equipment
Personal Protective Equipment
Safety Helmet: Protects the head from falling objects.
Safety Belt/Fall Arrestor: Attached when working at heights to ensure personnel safety.
Non-slip Shoes: Prevents slipping on wet or slippery surfaces.
Gloves: Protects hands from cuts or abrasions.
On-site Safety Facilities
Warning Tape/Fence: Demarcates the work area to prevent unauthorized personnel from entering.
Fire Extinguisher: For potential fires caused by welding or electrical work.
First Aid Kit: Equipped with bandages, disinfectant, etc., for minor abrasions or sprains.
IV. Auxiliary Tools and Materials
Cleaning and Treatment Tools
Wire Brush/Sandpaper: Removes rust and oil from steel surfaces to improve paint adhesion.
Air Compressor/Spray Gun: Sprays anti-rust paint or topcoat (dry film thickness must be controlled ≥240μm according to GB/T 13452.2-2008 standard). Dehumidifier: Accelerates the drying of concrete or paint in humid environments.
Marking and Recording Tools
Marker: Marks the installation sequence or number on components to avoid confusion.
Installation Record Sheet: Records key data such as bolt torque values and weld quality for later acceptance.
V. Installation Process and Tool Application Examples
Foundation Construction Stage
Use a laser level to locate the center of the foundation pit, and use an ink line box to mark the edge lines.
Excavate to the design depth (usually ≥80cm) with an electric pick, and trim the edges with a shovel.
Pour C30 concrete, vibrate to compact, and finish with a trowel.
Structural Assembly Stage
Move the columns to the side of the foundation pit using a forklift, and use a manual hoist to lift them onto the embedded parts.
Tighten the anchor bolts with a torque wrench, and calibrate the column verticality with a spirit level.
Install the extension arm with an electric wrench, and adjust the angle gauge to the design angle.
Backboard and Hoop Installation
Lift the backboard to the end of the extension arm with slings, and tighten the connecting bolts with a socket wrench.
Calibrate the backboard level with a spirit level tube, and check the gaps with a feeler gauge. Weld the weld seam at the connection between the welding machine's backing plate and the extension arm (as per design requirements).
Final Inspection Phase: Record all bolt torque values and inspect the weld quality.
Clean the site, remove warning tape, and complete the installation acceptance form.
padel court,Gymnastic mats, basketball racks, volleyball posts, tennis dwellings, badminton posts, adult gymnastic equipment, parallel bars, horizontal bars, uneven bars, gymnastic rings, balance beams, saddles, hydraulic referee tables, table tennis tables, outdoor fitness equipment, garden fitness equipment
Website:
http://hransports.com/article/327.html