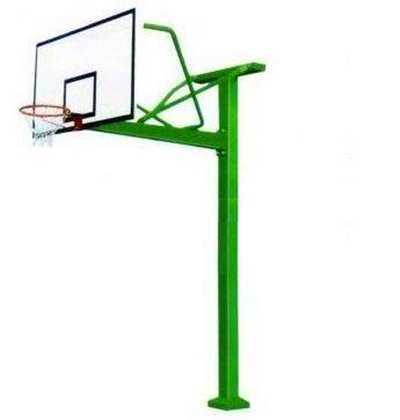
What tools are needed to install a street underground basketball stand?
Installing an underground basketball hoop requires a range of specialized tools and materials to ensure a standardized installation process, a stable structure, and compliance with safety standards. Hebei Haoran Sports, China, lists the main tools and their specific uses during installation:

1. Foundation Construction Tools
Measuring and Positioning Tools
Tape Measure (over 5 meters): Used to accurately measure foundation pit dimensions, buried depth, and the spacing between basketball hoop components to ensure the installation location meets design requirements.
Level: Checks the verticality of the basketball hoop's columns and the horizontality of the backboard to avoid any risks associated with tilting.
Plumb Bob: Assists in locating the center of the foundation pit, ensuring a symmetrical and aesthetically pleasing basketball hoop after installation.
Marker/Spray Paint: Marks the foundation pit location, embedded component installation points, and concrete pouring boundaries.
Excavating and Concreting Tools
Shovel/Luoyang Shovel: Excavates the foundation pit to the design depth (usually 60 cm to 1.5 meters).
Electric Pick/Breaker (optional): Used for demolition of hard surfaces (such as concrete) to improve excavation efficiency.
Vibrator: Used after concrete pouring to remove air bubbles and ensure concrete density. Trowel/Scraper: Smooth the concrete surface flush with the ground.
II. Structural Assembly Tools
Bolt Tightening Tools
Adjustable Wrench/Socket Wrench: Tighten the bolts connecting the basketball hoop components to ensure structural stability.
Torque Wrench (Optional): Control the bolt tightening torque according to design requirements to avoid overtightening or undertightening.
Hex Wrench: Used to tighten the hex socket bolts connecting the backboard frame and bracket.
Welding and Cutting Tools (If On-Site Processing is Required)
Electric Welder: Welds the connection between embedded parts and brackets (some products have prefabricated embedded parts, eliminating the need for on-site welding).
Angle Grinder: Cuts excess steel or grinds welds to improve installation accuracy.
Welding Rod/Wire: Welding material compatible with the steel material.
III. Safety Tools
Personal Protective Equipment
Hardhat: Protects the head from falling objects or collisions.
Protective Gloves: Protects hands from sharp edges and tools. Dust masks/goggles: Prevent dust and splashing from entering the respiratory tract or eyes during concrete pouring or cutting.
Reflective vests: Improve visibility during outdoor construction to prevent traffic accidents.
Warning signs
Warning lines/fences: Demarcate the construction area to prevent unauthorized access.
Safety warning signs: Display warnings such as "Construction Danger" and "Keep Out."
IV. Auxiliary Materials and Equipment
Concrete Materials
C30 and above grade concrete: Used for pouring the foundation pit to ensure a secure bond between embedded components and the ground.
Concrete mixers/hand trucks: Mix and transport concrete to the construction site.
Lubricating and Cleaning Materials
Grease: Apply to bolt threads to facilitate tightening and prevent rust.
Cleaning cloths/solvents: Clean oil and debris from bolt holes, backboard surfaces, and other areas.
Leveling Materials
Wedges/Wedges: Used to adjust the verticality of the basketball hoop columns to ensure installation accuracy. 5. Examples of Tool Use in the Installation Process
Excavation of the Foundation Pit
Use a tape measure to measure the dimensions of the foundation pit, use a plumb bob to locate the center point, and use a shovel to excavate to the designed depth.
Before pouring concrete, use a level to check the flatness of the foundation pit bottom.
Installation of Embedded Parts
Place the embedded parts in the foundation pit, adjust the verticality with a level, and secure them before pouring concrete.
Use a vibrator to vibrate the concrete, and use a trowel to smooth the surface.
Assembling the Main Structure
Use an adjustable wrench to tighten the bolts connecting the columns to the base, and a torque wrench to control the torque.
When installing the backboard, use an Allen wrench to tighten the frame bolts, and use a level to check the levelness of the backboard.
Safety Check
After installation, shake the basketball hoop to test its stability and check for loose bolts.
Clean up the construction site and remove the cordon.
padel court,Gymnastic mats, basketball racks, volleyball posts, tennis dwellings, badminton posts, adult gymnastic equipment, parallel bars, horizontal bars, uneven bars, gymnastic rings, balance beams, saddles, hydraulic referee tables, table tennis tables, outdoor fitness equipment, garden fitness equipment
Website:
http://hransports.com/article/318.html